Turreting Treat-Launching Catapult for my Dog
Making my dog less fat
Project at a glance
- Built an automated treat dispenser with a lead-screw elevator and differential turret.
- Integrated servos, sensors, custom PCB wiring, and jam detection.
- Programmed an autonomous daily dispensing cycle with fault handling.
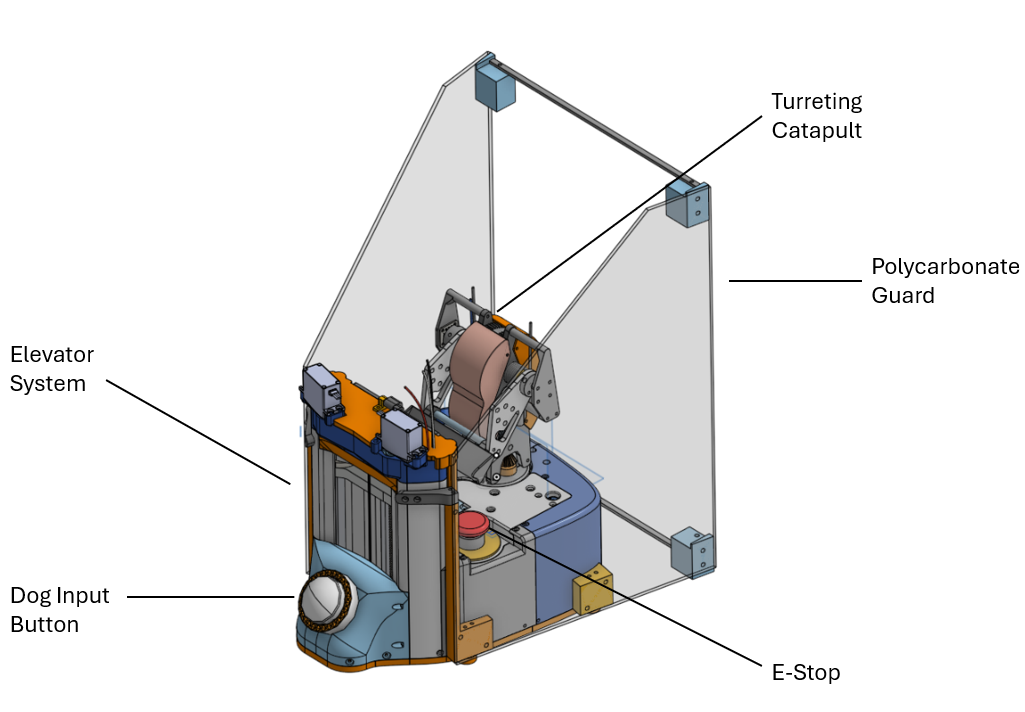
My family’s dog Griff gets a lot of treats at home. Our rule has always been one treat per day, but we sometimes miscommunicate about who fed him and he ends up getting several. Now he is getting fat! To solve this problem, I designed an automated launcher for his favourite treat, a Greenie, that limits him to one per day. My family no longer gives him treats directly; Griff requests one himself by pressing a button. The overview video above shows the complete cycle.
What It Does
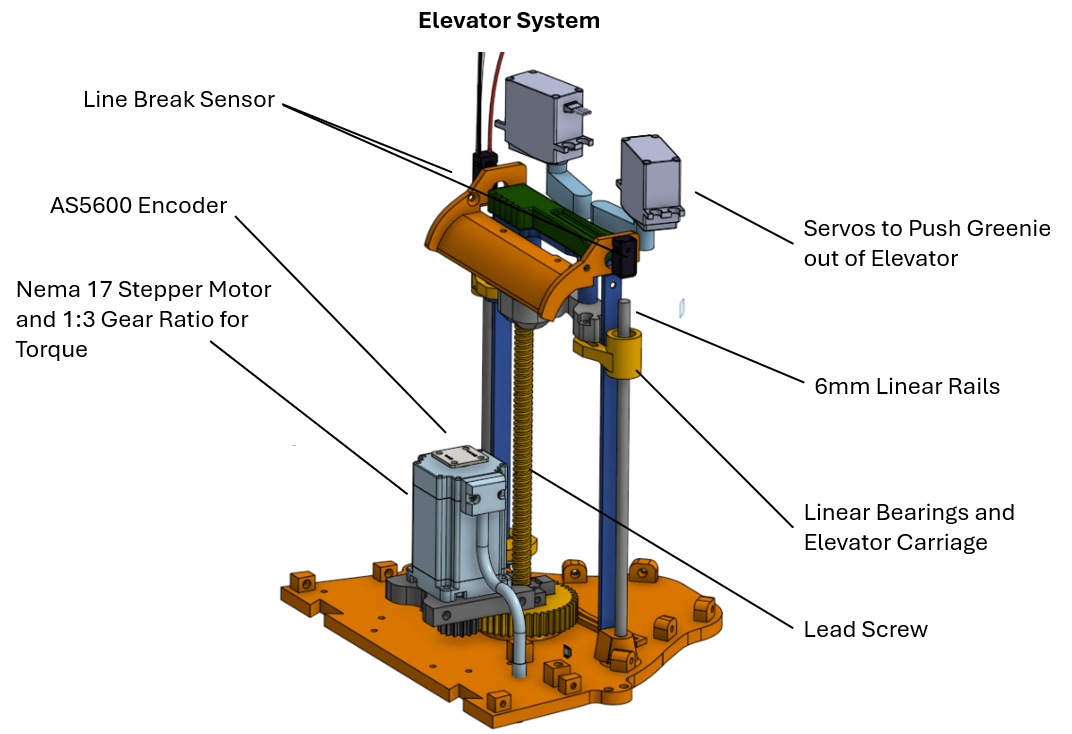
On startup, the machine calibrates the treat elevator against a limit switch at the bottom of its travel. The stepper-motor encoder then tracks the elevator position. It moves upward until a Greenie breaks the beam sensor at the top, confirming that a treat is ready to dispense.
Once a Greenie is in position, a 24-hour timer begins. When it expires, the launcher plays music to indicate that it is ready. Griff can then press the button to request his treat. The catapult rotates to the collection position, two servo arms push the Greenie into it, and the turret returns to the firing position. After launch, the elevator loads the next Greenie and restarts the timer.
I also added fault detection. The controller detects jams and triggers an alarm; in the video below, I force one by holding the elevator lid closed.
The same beam sensor detects when the elevator is empty. If the elevator reaches the top of its travel without breaking the beam, the controller requests more treats.
Mechanical Design
I designed the mechanical system in Onshape. It has two main subsystems: the elevator and the differential-turret catapult.
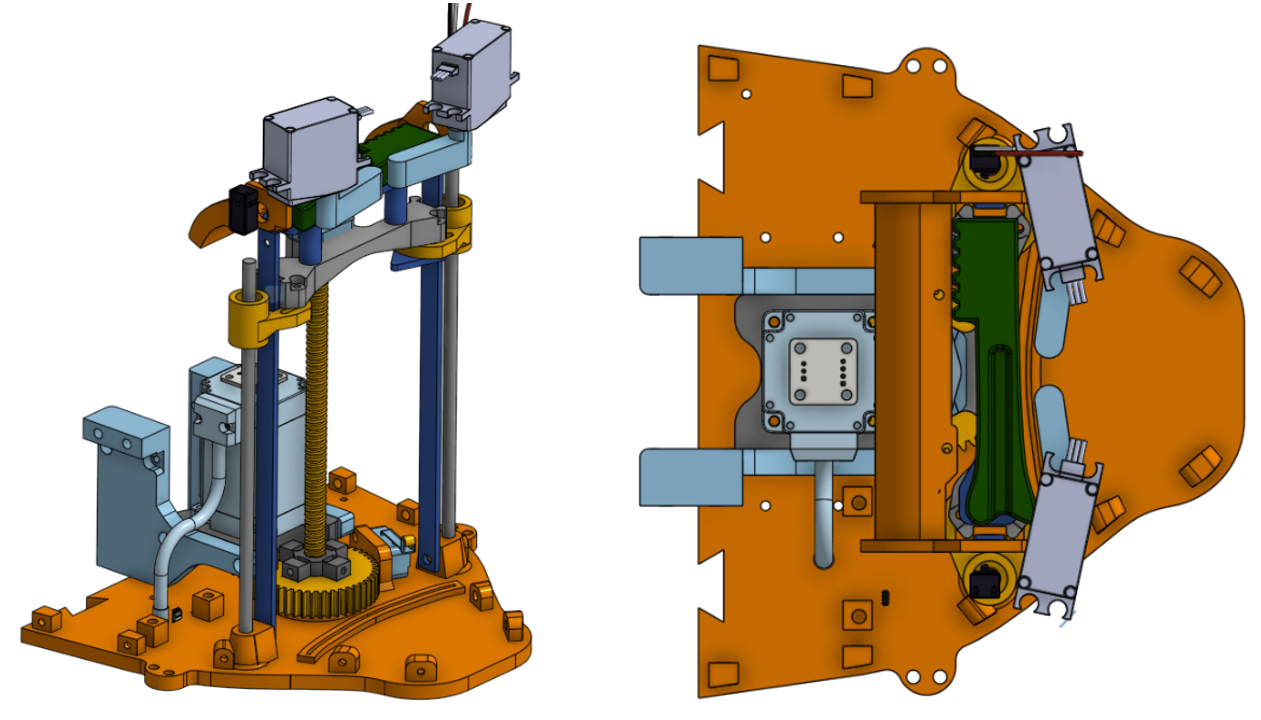
The elevator stores enough Greenies for nine cycles. A closed-loop stepper motor drives a lead screw through a 3:1 gear stage. A platform constrained by two linear guide rails travels along the screw. A limit switch establishes the lower position, a beam sensor detects a treat at the top, and two servo arms push the Greenie into the catapult. The airtight enclosure keeps the treats fresh.
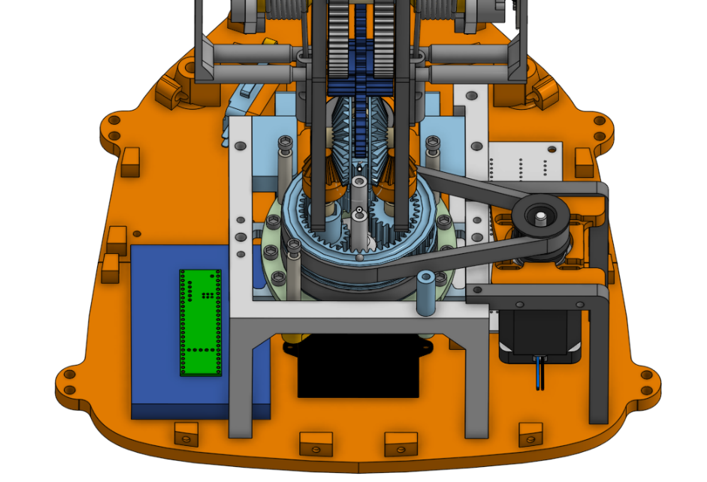
The turret uses a differential-swerve-style mechanism. When the two input motors rotate in the same direction, the entire planetary gearbox turns. When they rotate in opposite directions, the coupling bevel gear changes the catapult angle. I selected this approach instead of mounting another motor on the turret because it was a more interesting mechanical challenge.
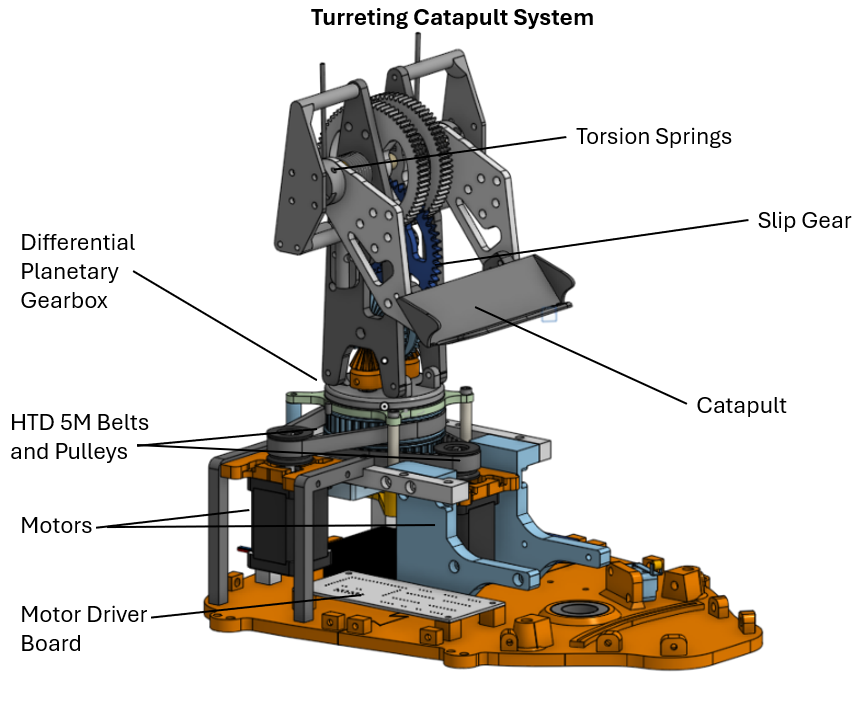
The blue arrow shows the torque path when the motors rotate in opposite directions.
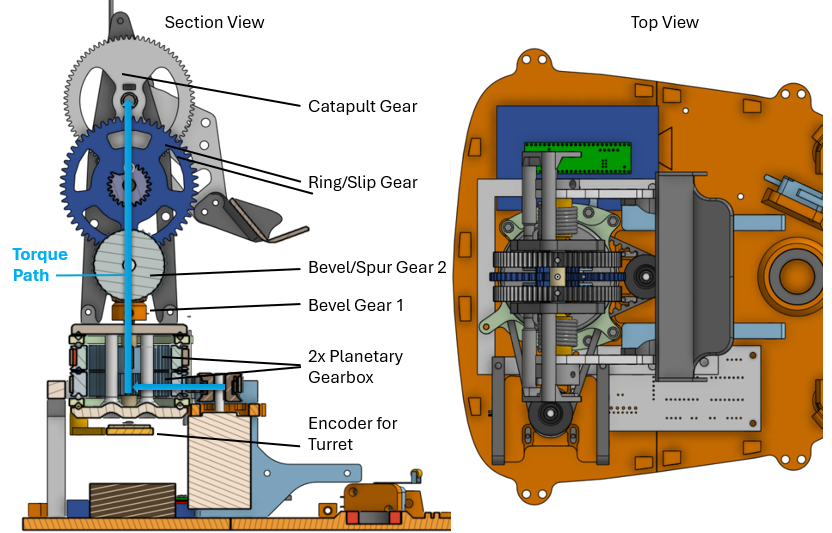
When the motors are spinning in opposite directions:
View of the gearbox:
Electrical Design
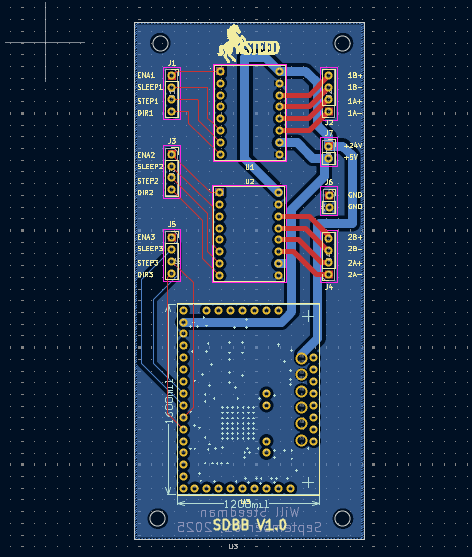
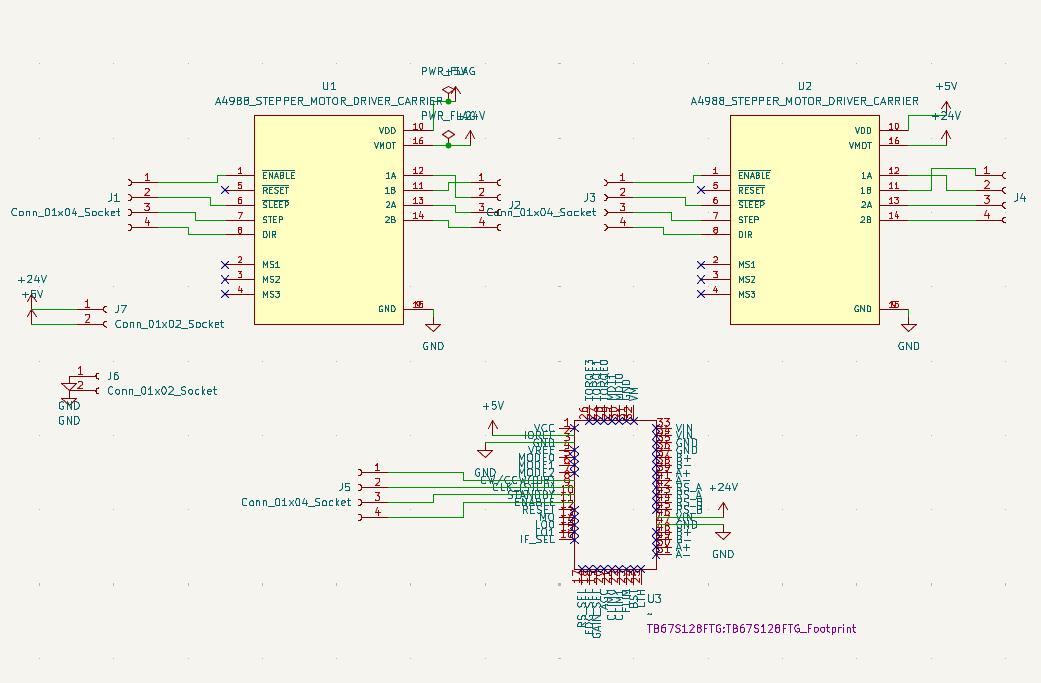
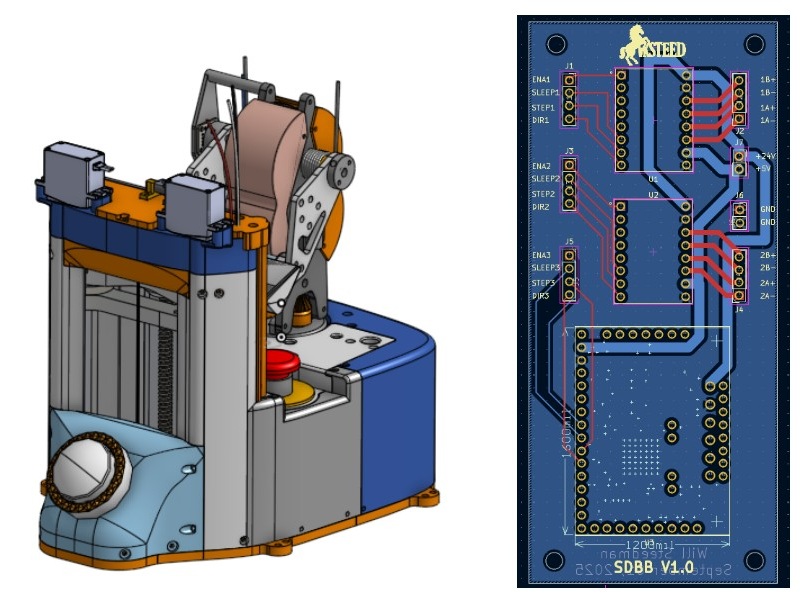
I designed a small breakout board in KiCad to simplify the power wiring. Surface-mount terminal blocks let me secure each wire lead with a screw connection. Two A4988 drivers control the NEMA 14 turret motors, while a Toshiba TB67S128FTG drives the NEMA 17 elevator motor.
The schematic prioritizes function over presentation, but it provided the required connections.
Here is a first test I did:
Process and Problems
I prototyped the most difficult mechanism—the differential-turret catapult—first. I began by validating the turret:
Then I worked on integrating the catapult.
I then designed the elevator around the known catapult dimensions, reducing the risk of unexpected interference during integration.
Once the elevator design was complete, I assembled the system from the elevator back toward the turret.
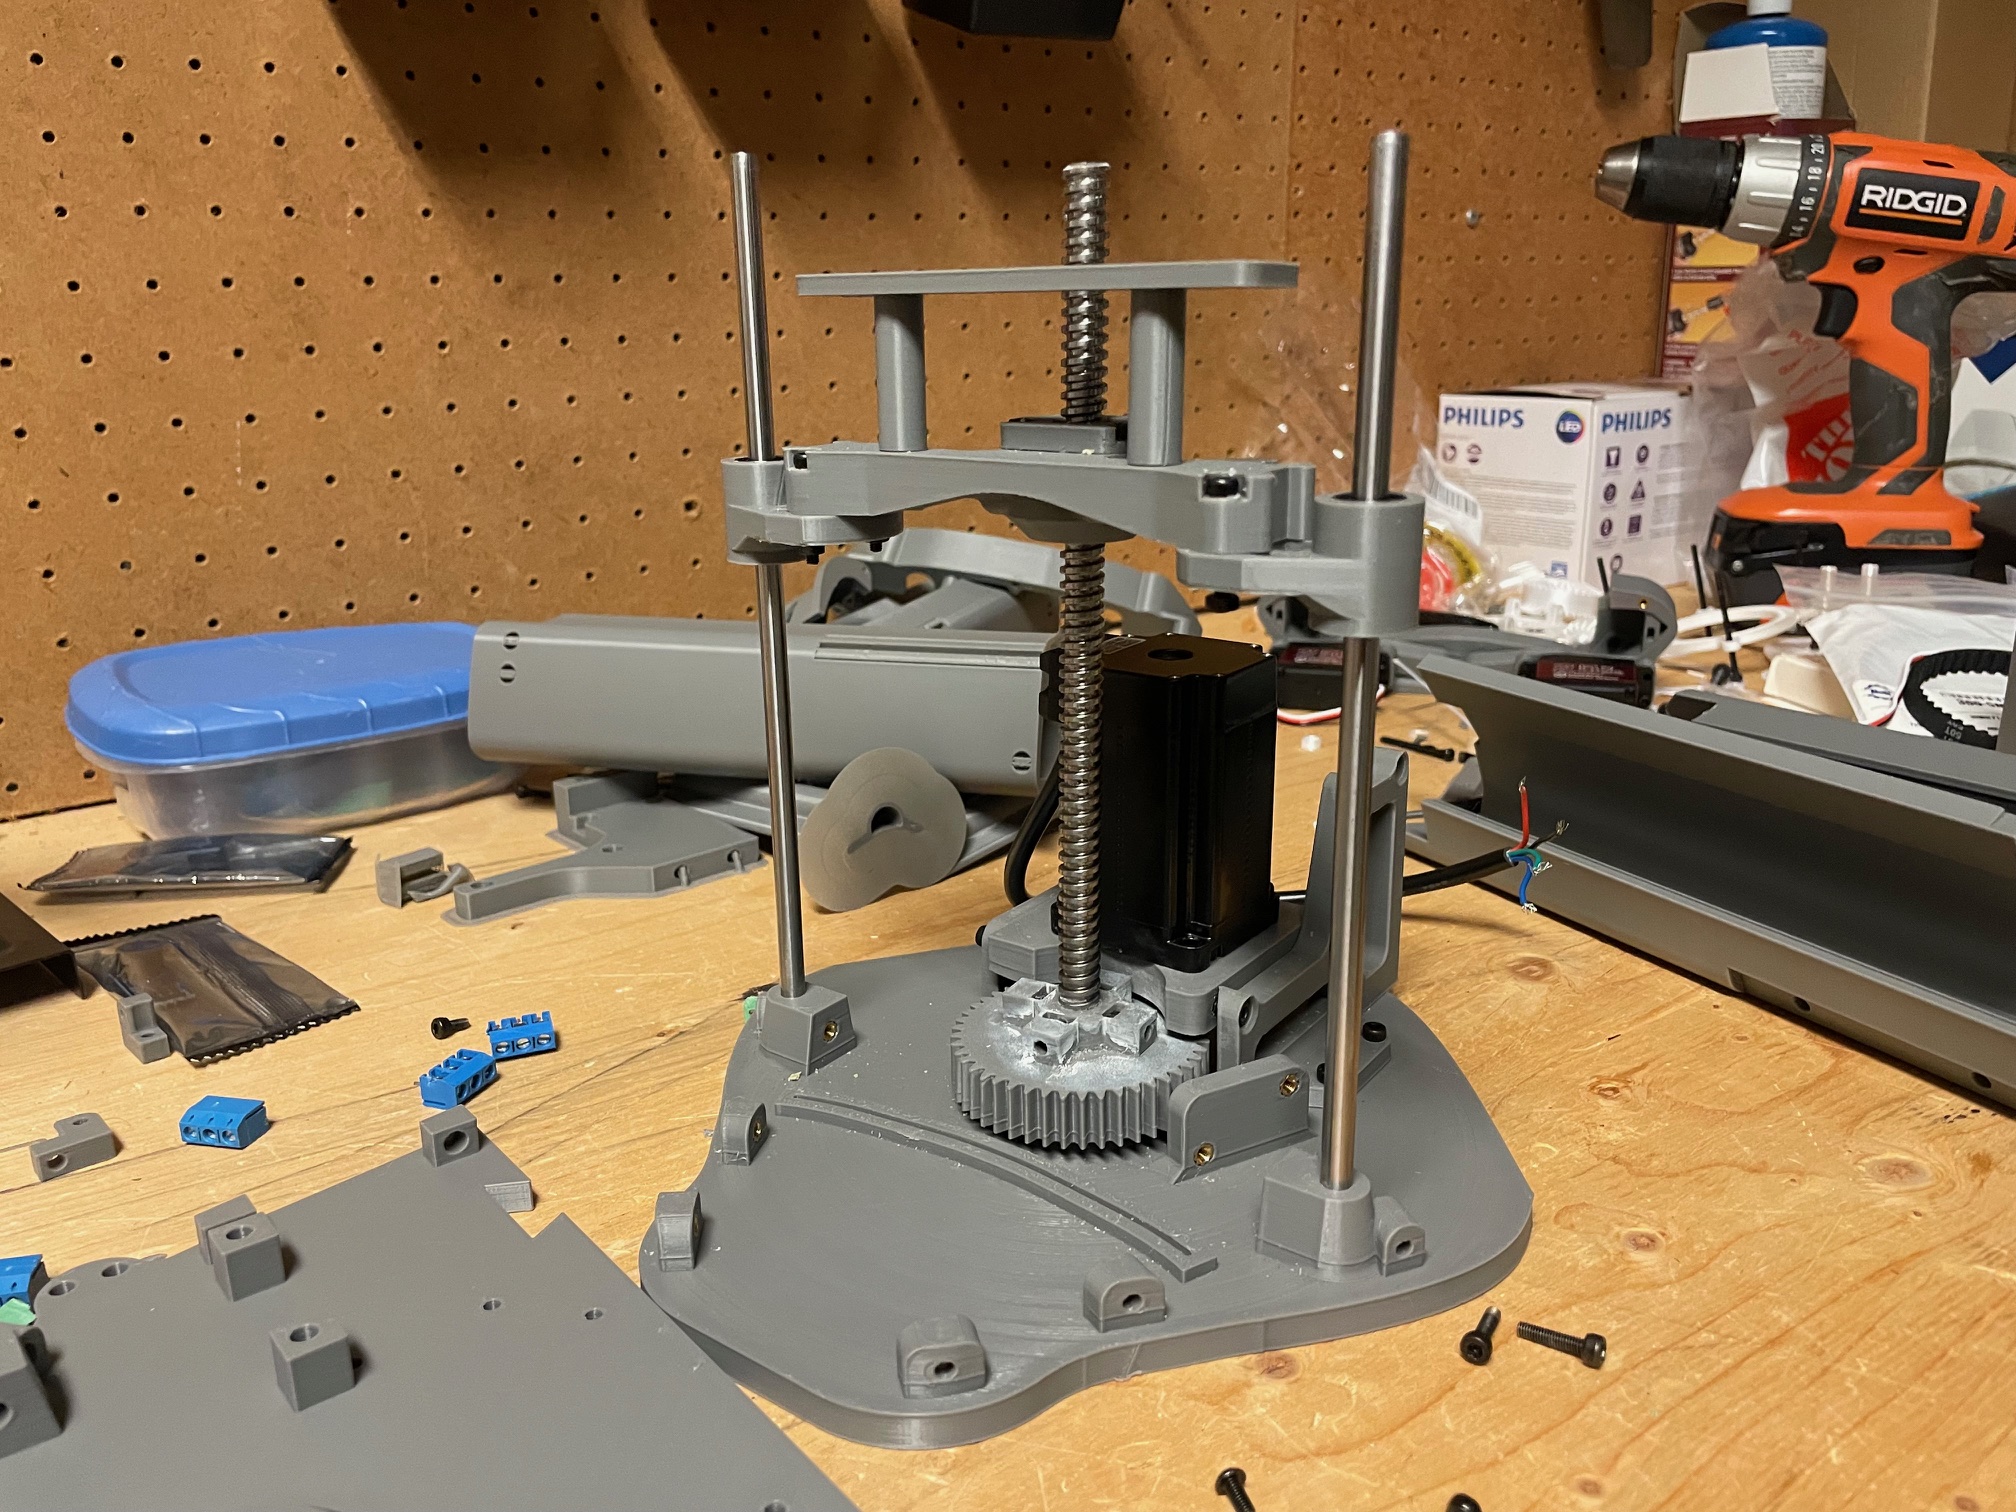
Elevator built and PCB mounted:
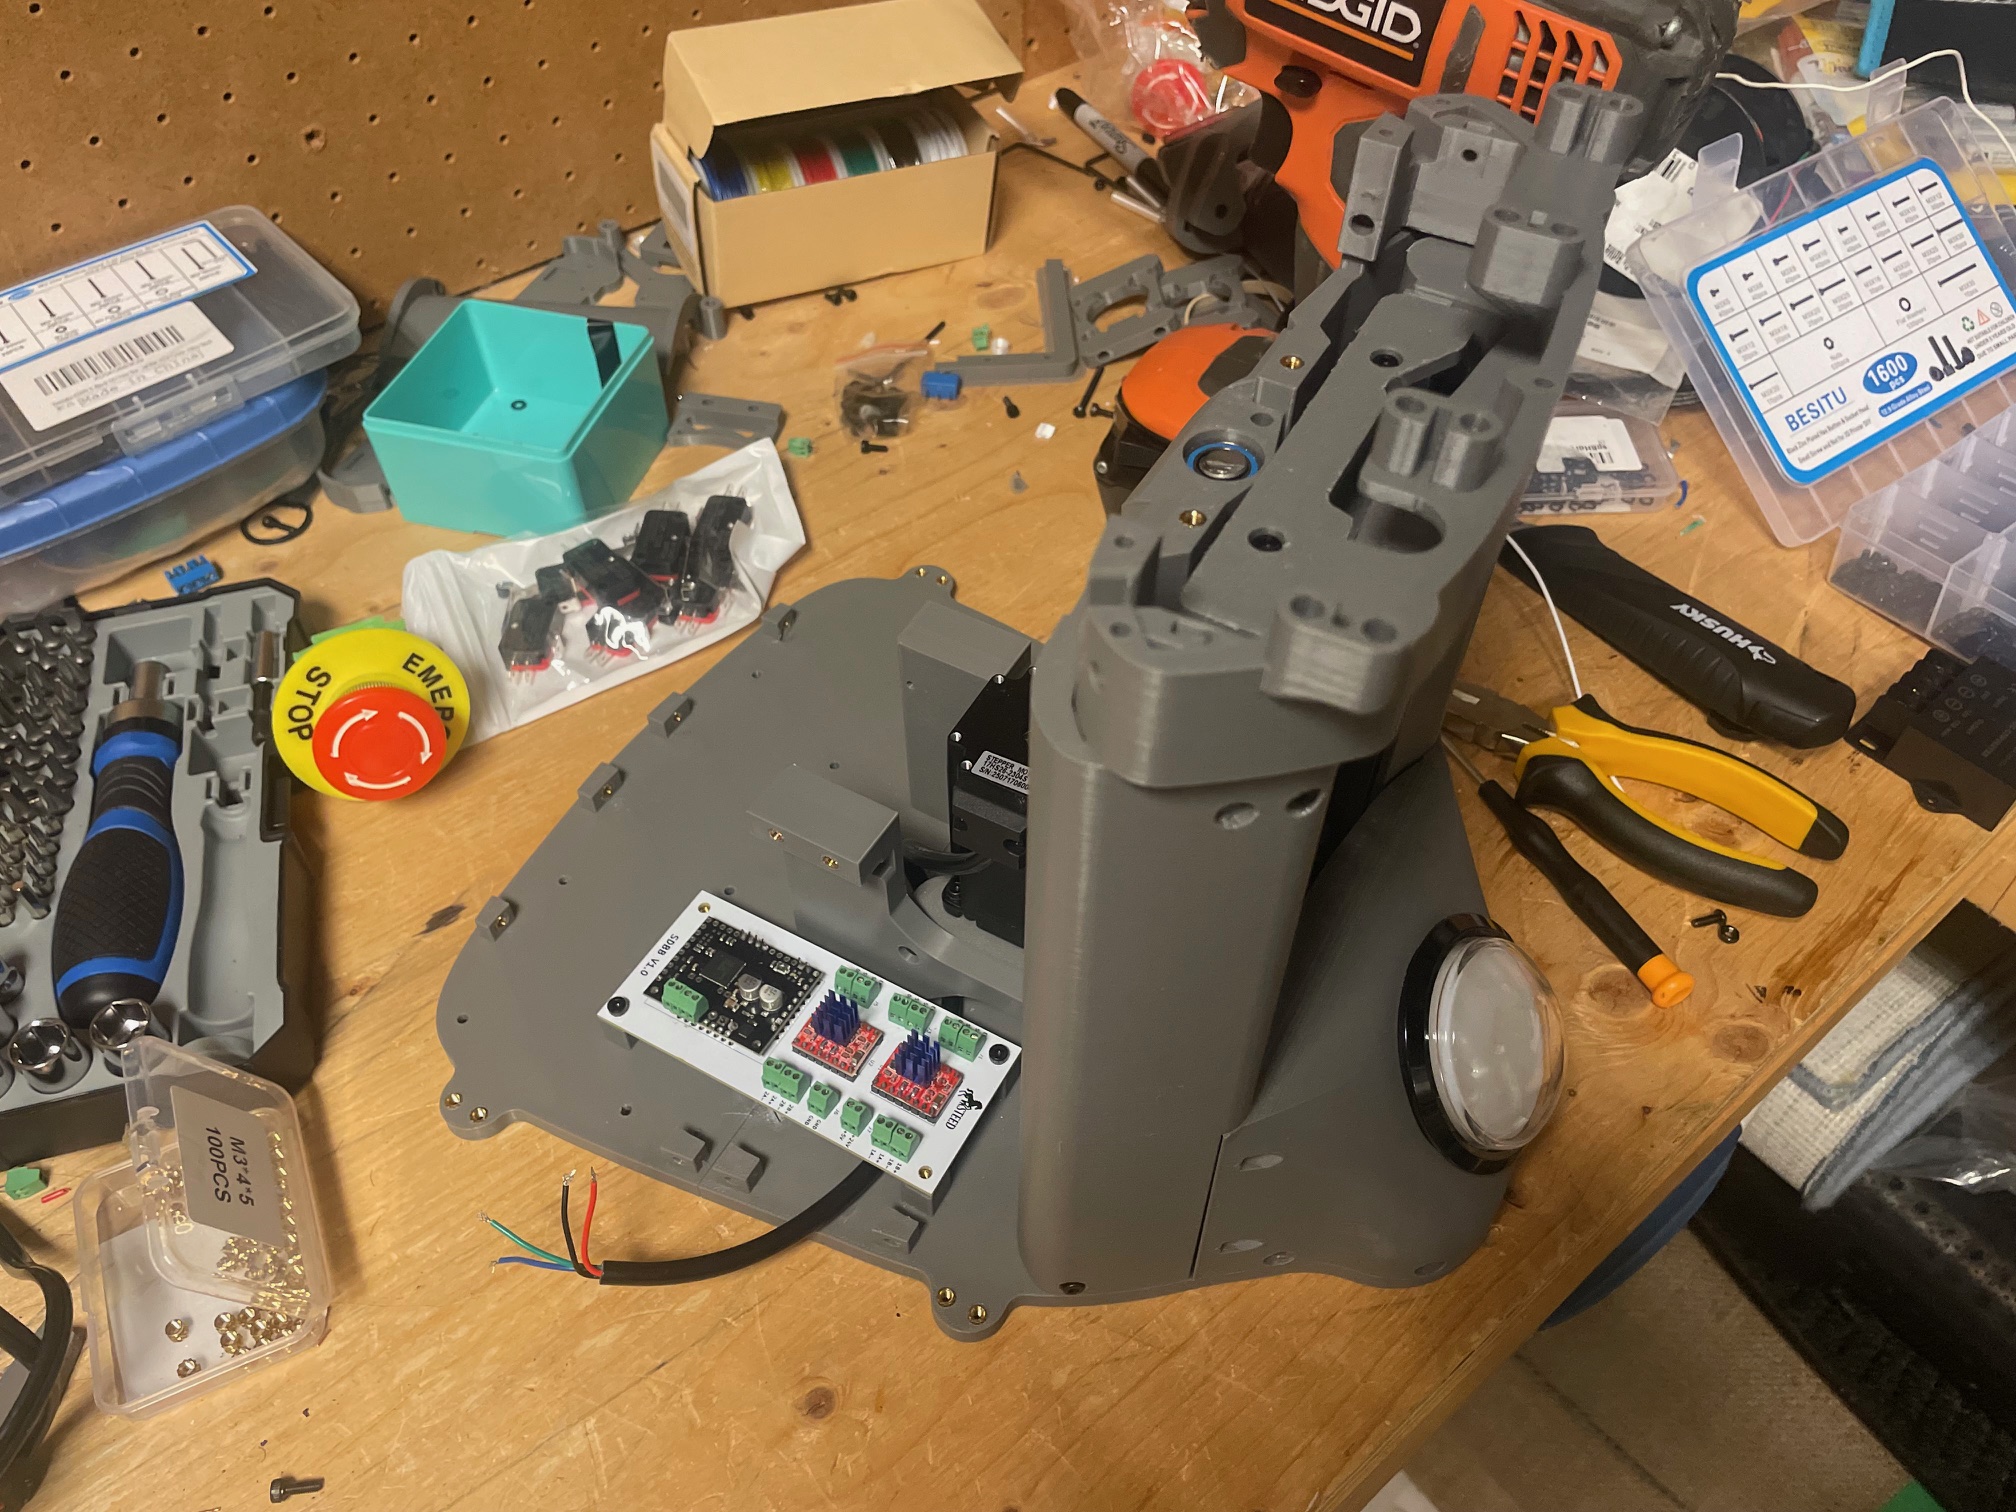
Front polycarbonate installed:
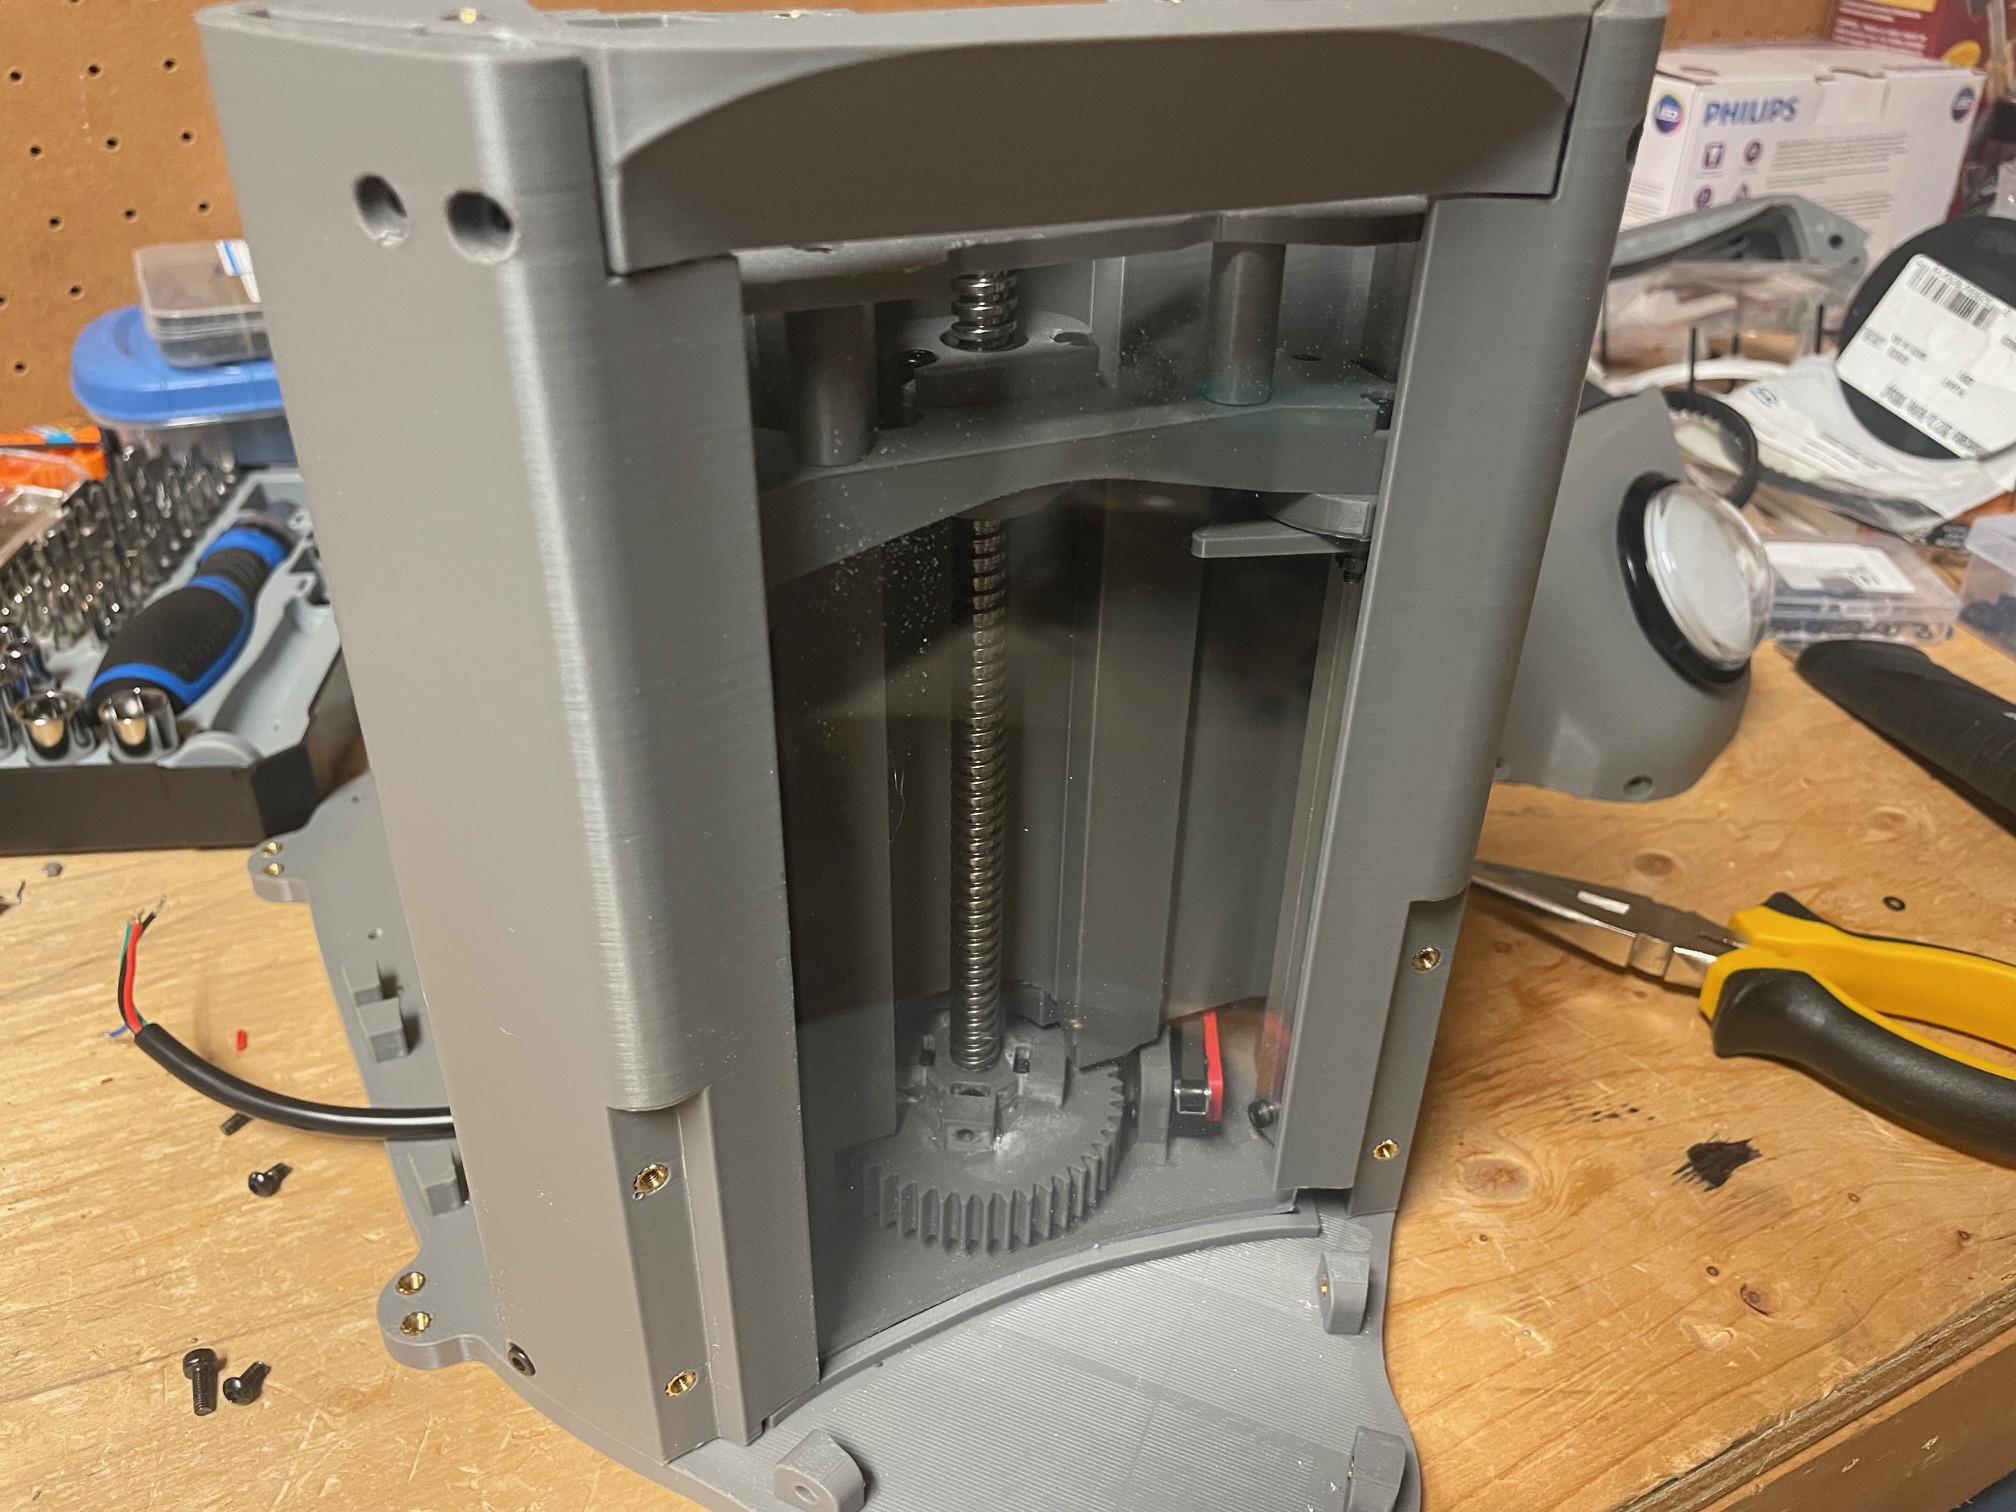
Turret frame started:
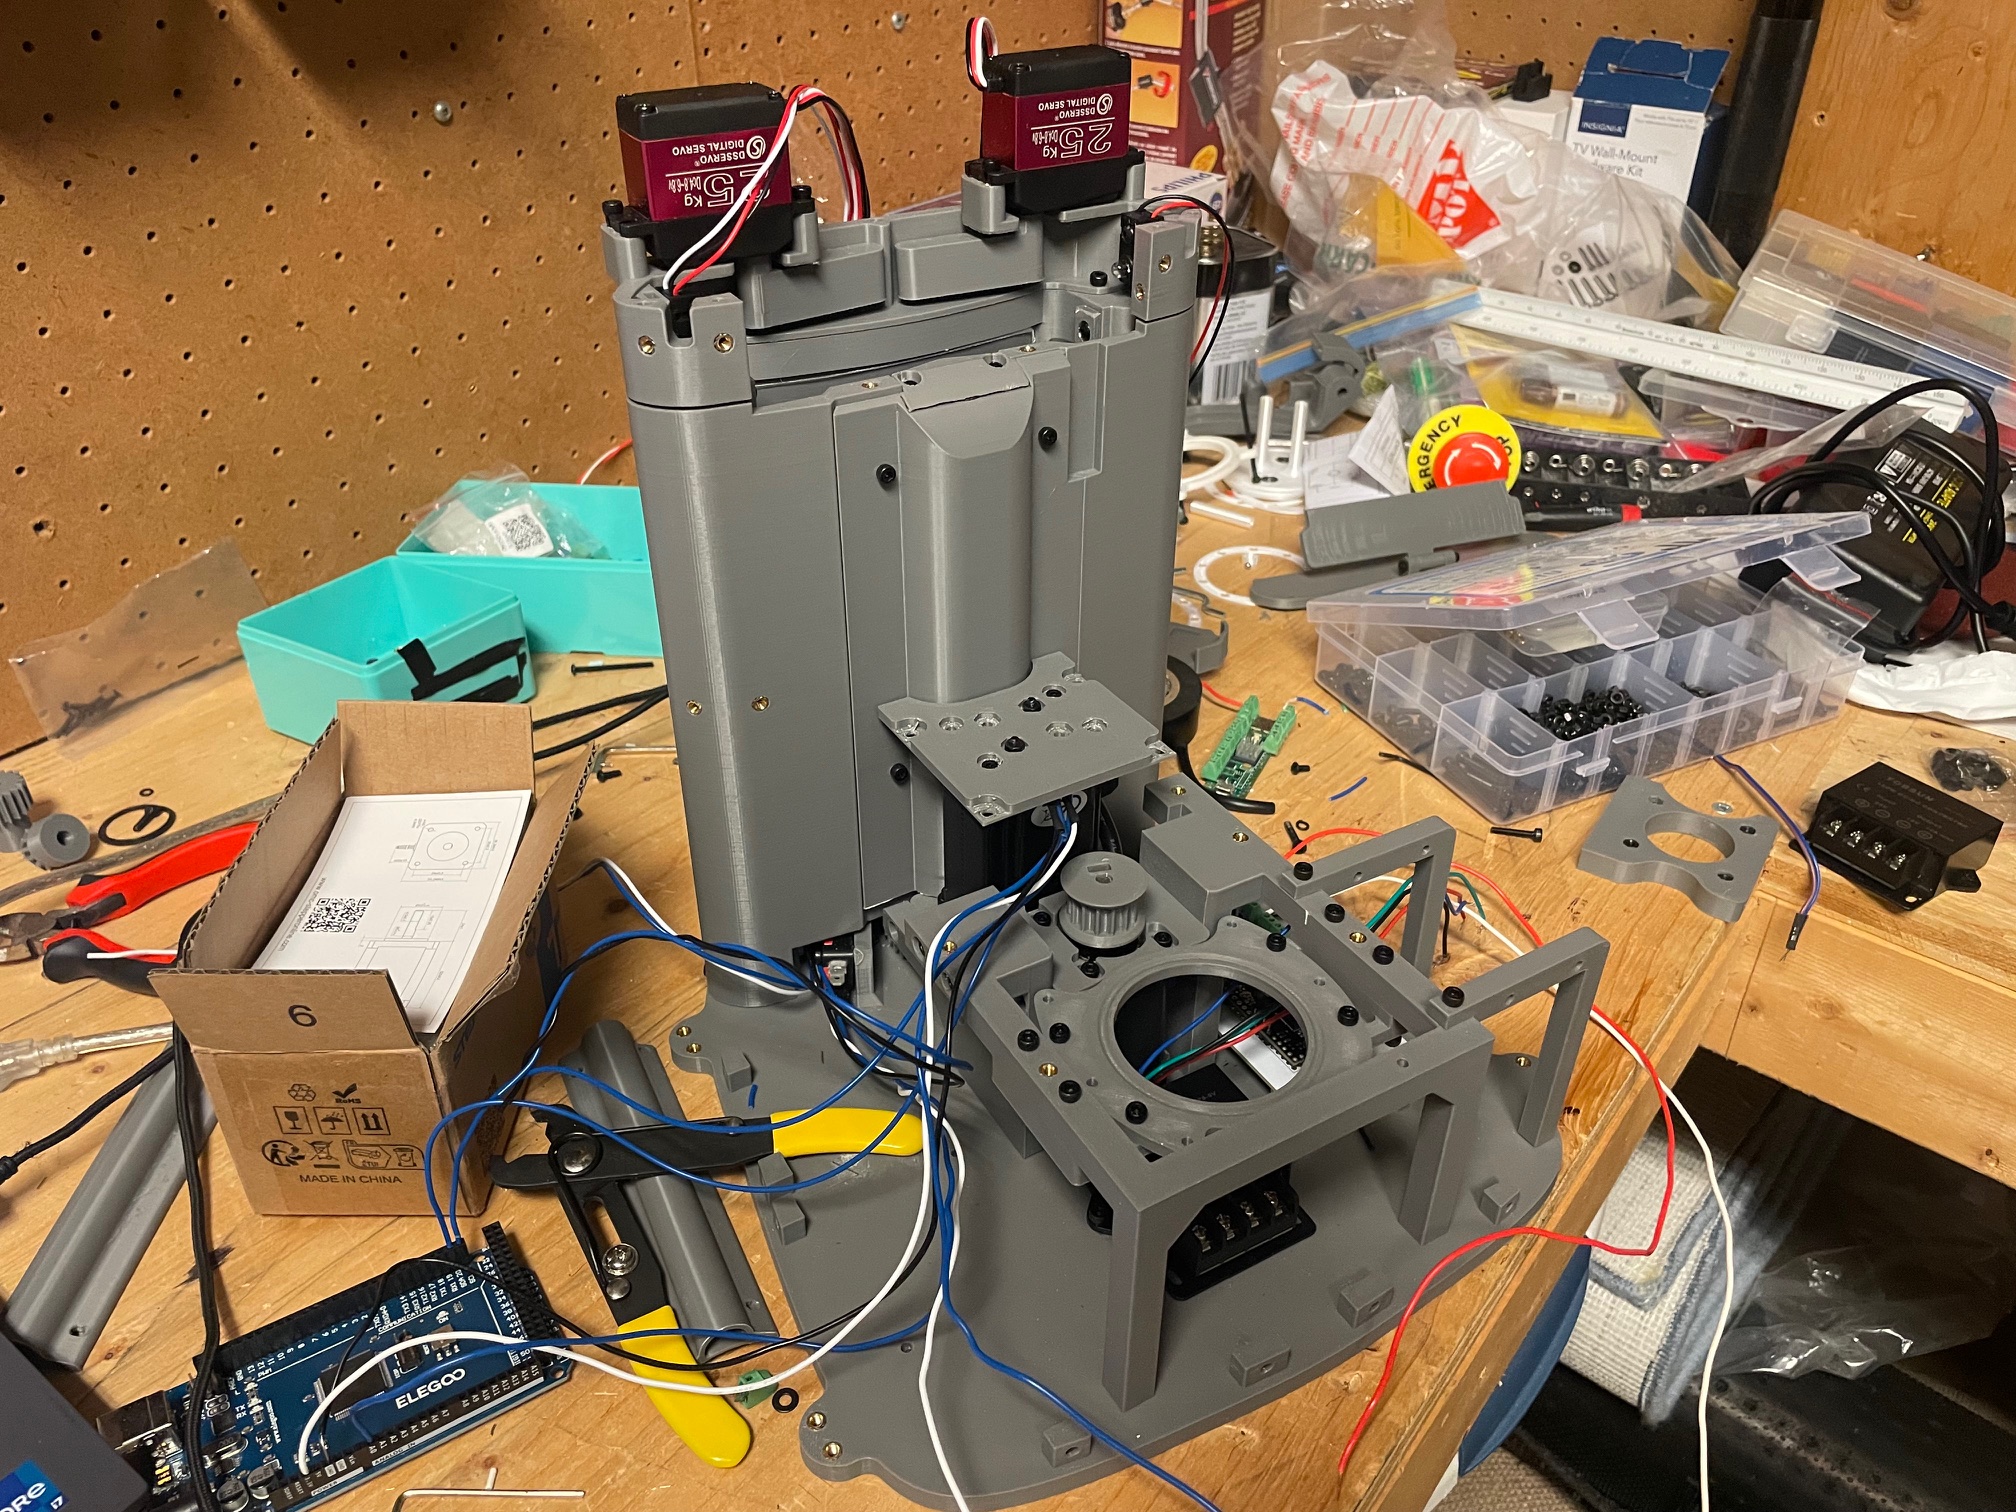
Bearings for Turret and Belts Installed:
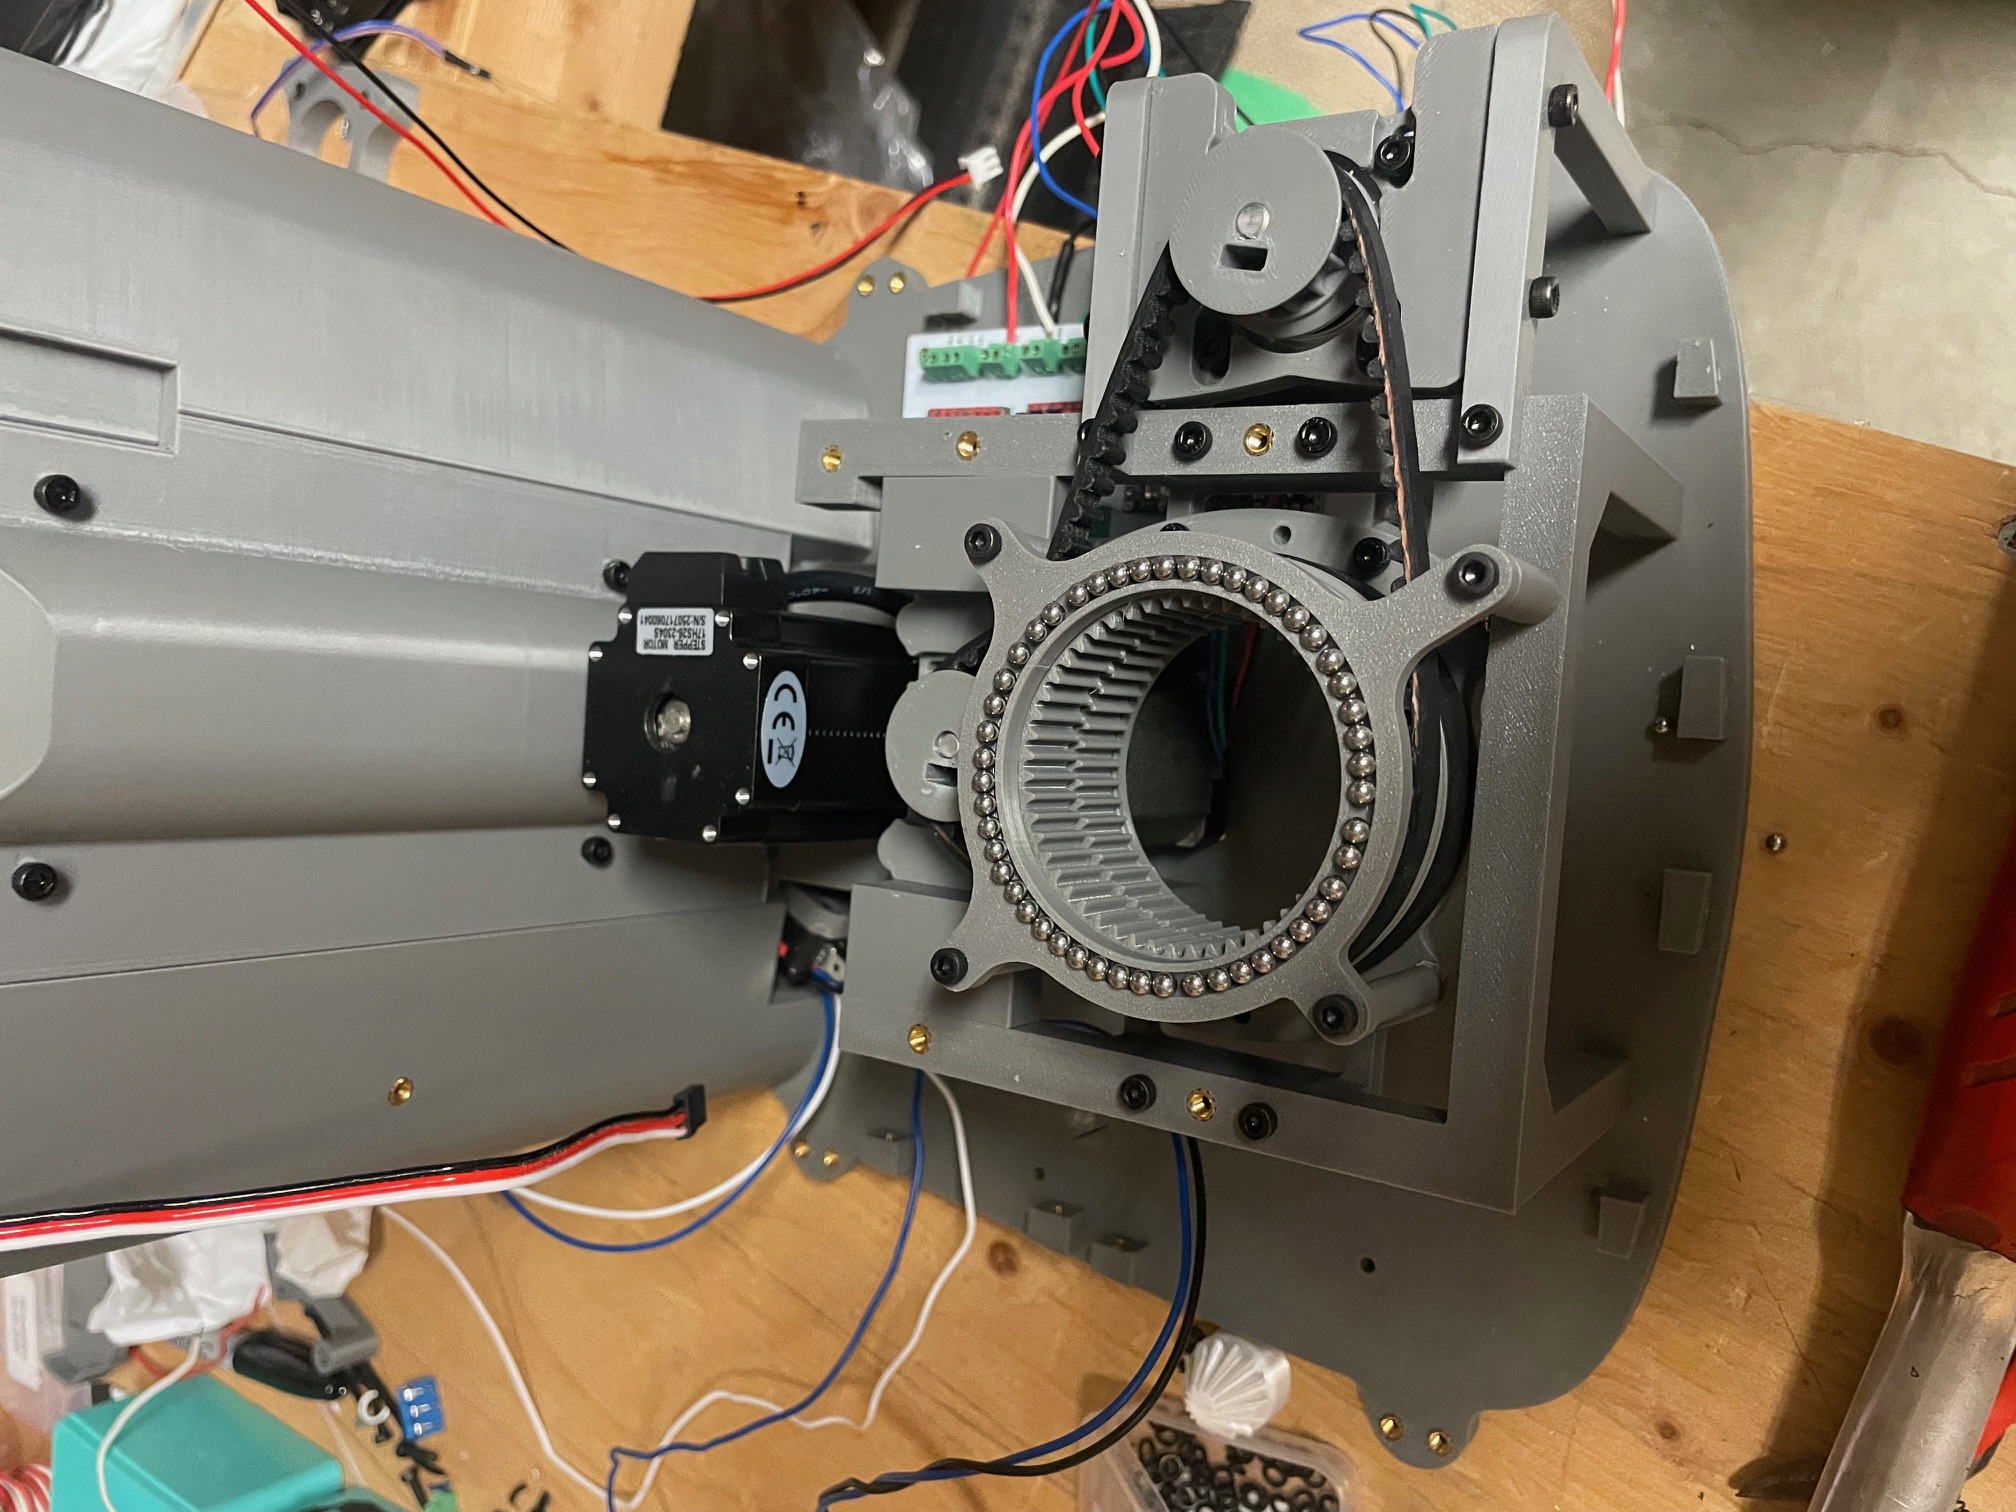
Test fit for catapult:
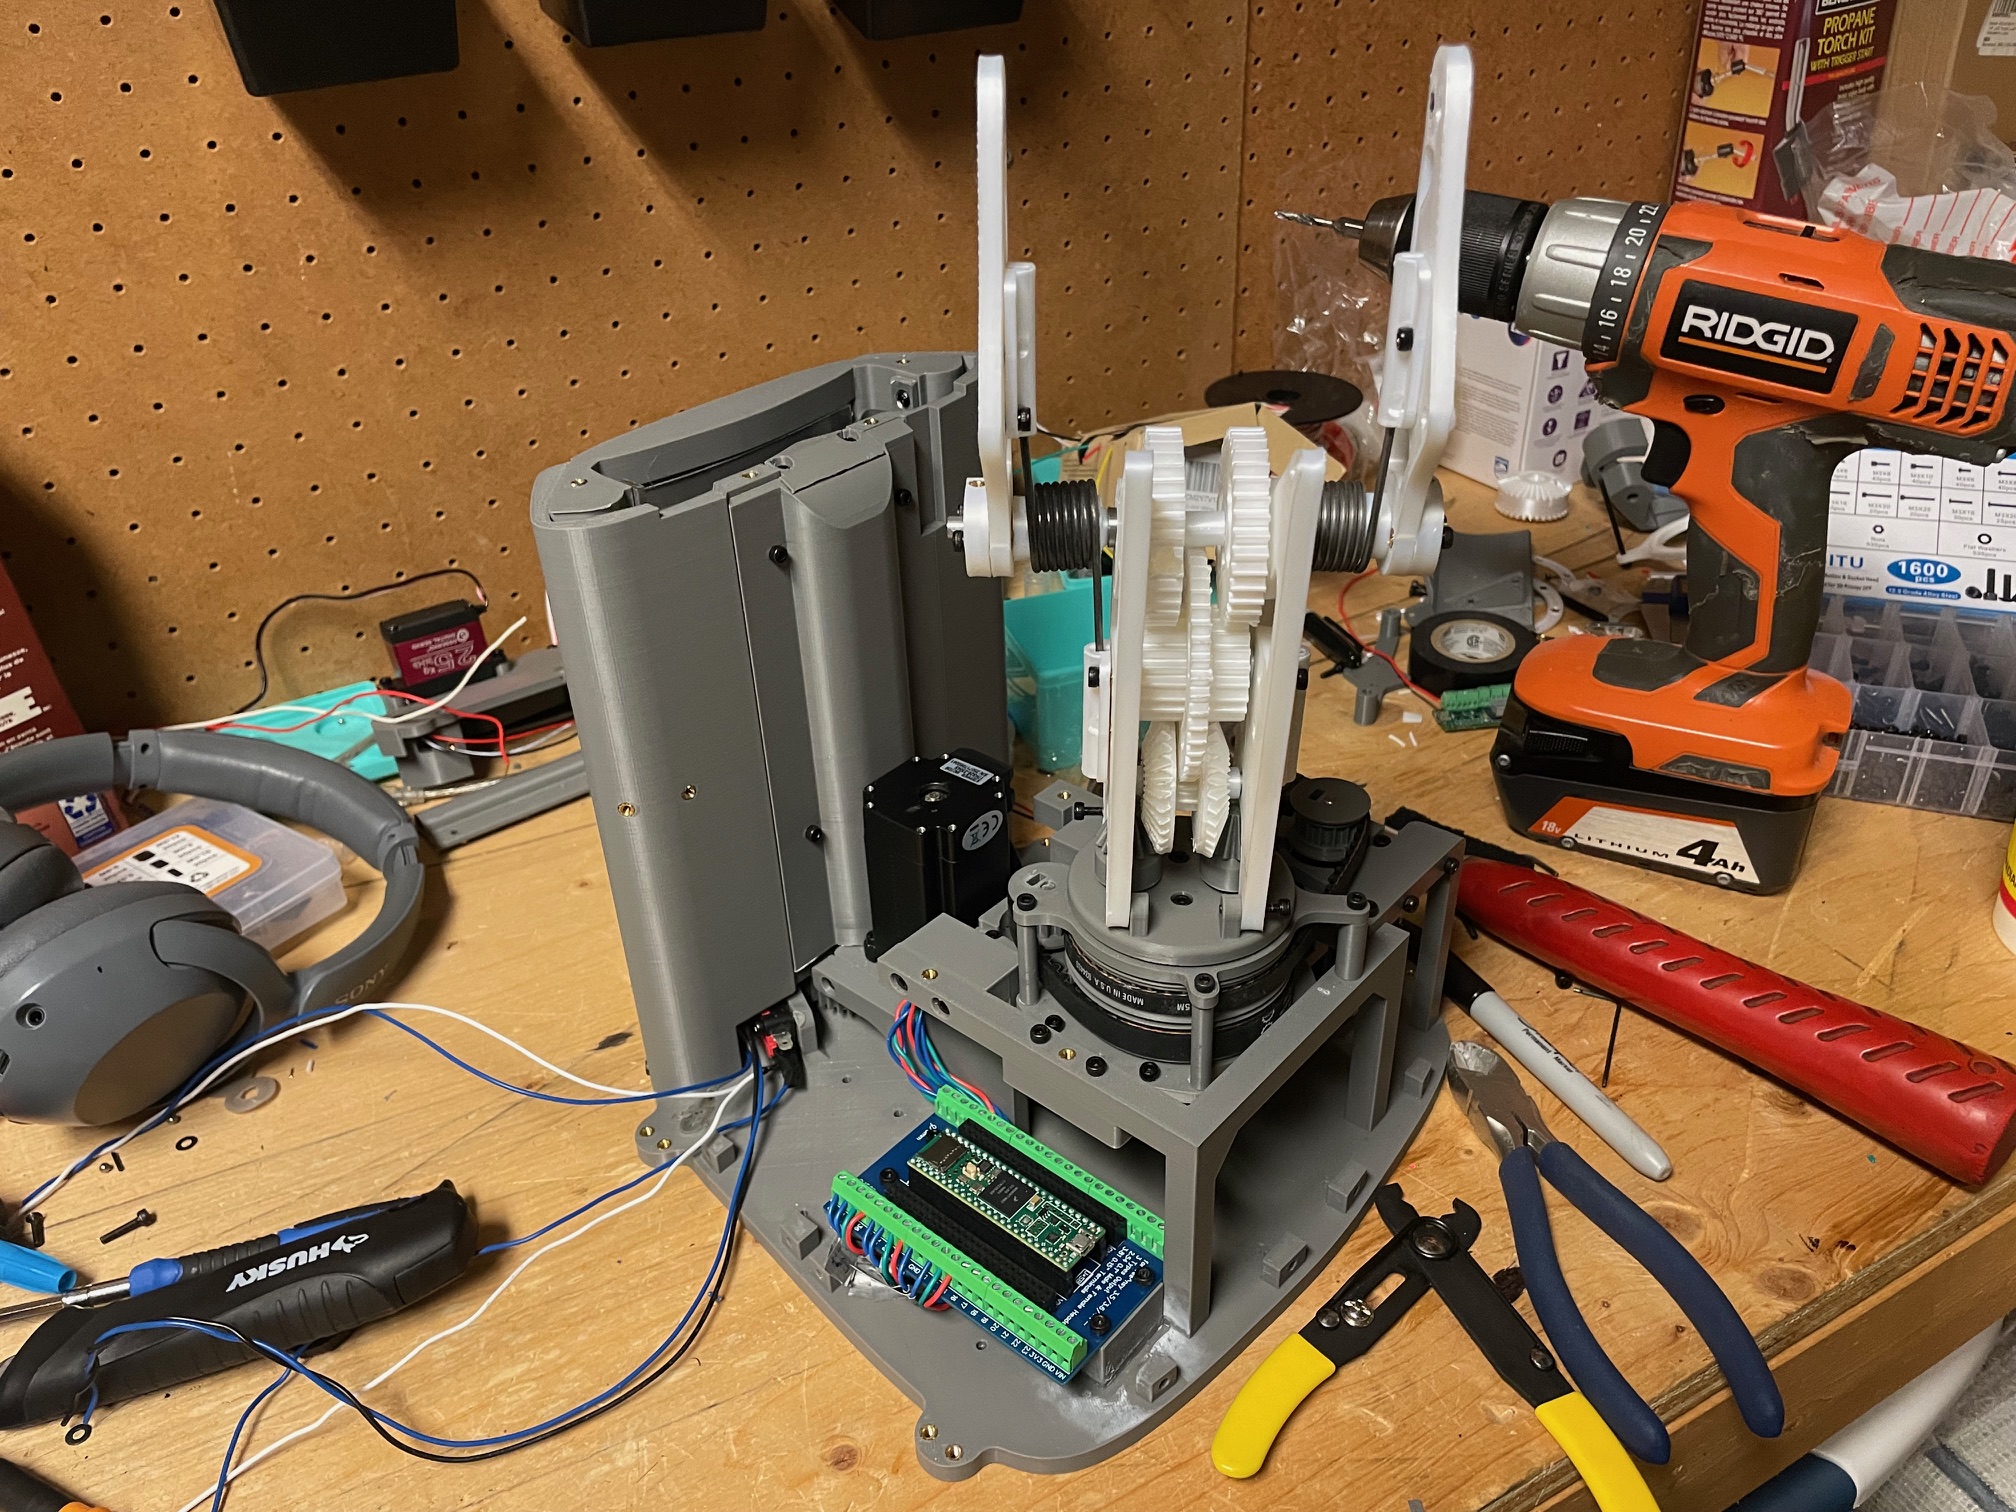
Once everything was assembled, I tested the largest torsion springs and achieved approximately 20 ft of Greenie travel:
Two problems were especially useful learning experiences:
Problem 1: Boolean logic precedence in Arduino
A Boolean-logic precedence mistake prevented the “block Greenie” button from stopping a dispense.
When polling for a button press (in the idle state), the program checks to see if it should allow a dispense using this line:
if (treatTimeIsUp() || firstCycleBypass || oneCycleBypass && !blockFeed) {
  dispense = true;
  break;
}
In C++, ! and && have higher precedence than ||, so !blockFeed applied only to oneCycleBypass. Adding parentheses around the three bypass conditions made the intended behaviour explicit.
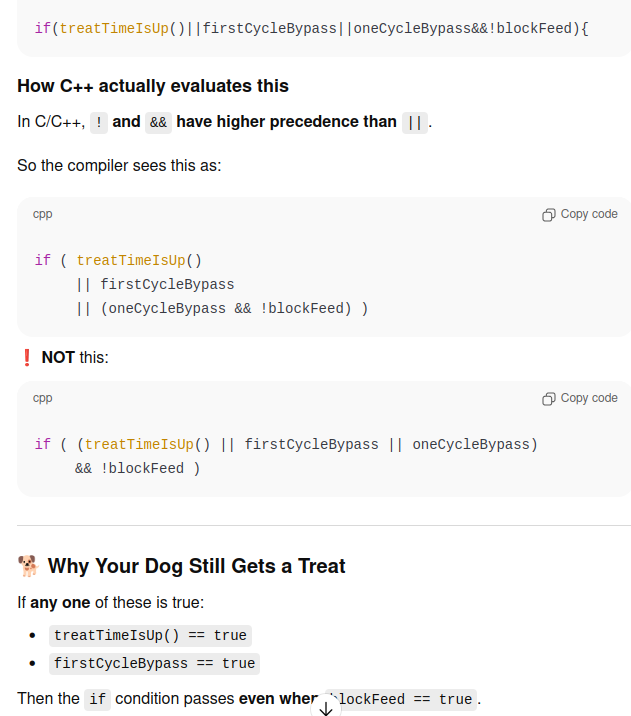
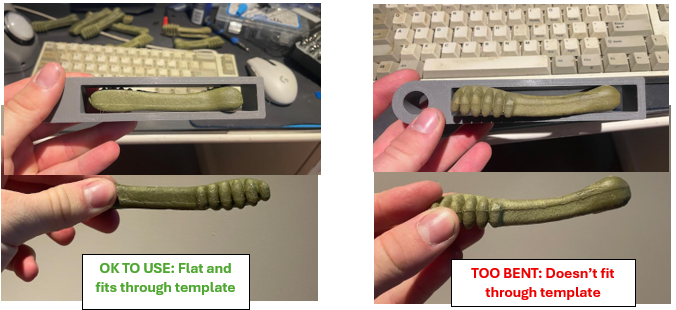
Problem 2: How do you deal with bent Greenies?
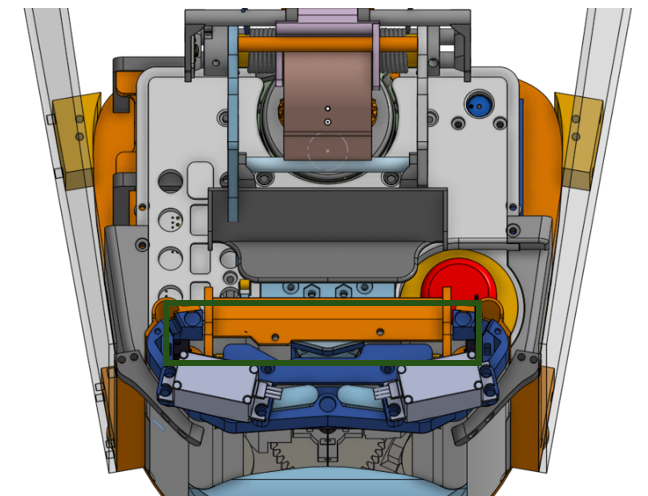
Bent Greenies caused frequent jams because their effective height exceeded the elevator clearance and they caught on an internal lip. Chamfering the ledge prevented many of these jams. I also made a sizing template and load only treats that fit within it.
Greenies would get stuck on the lip in the green box:
Conclusion
This project required substantial iteration across mechanical design, electronics, and embedded software. Resolving the major failure modes—especially jams, sensor states, and control logic—turned it into a reliable autonomous cycle and provided a strong full-system design experience.



















Related albums
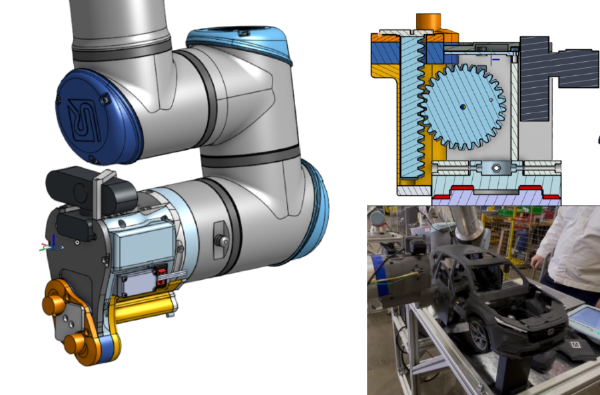
Honda Cobot Assembly Demo
- Helped create a UR10e cobot demo that assembled a 3D-printed Honda CR-V model.
- Designed a magnetic rack-and-pinion end effector with Arduino-controlled tooling.
- Achieved a 100% assembly success rate throughout the public demo day.
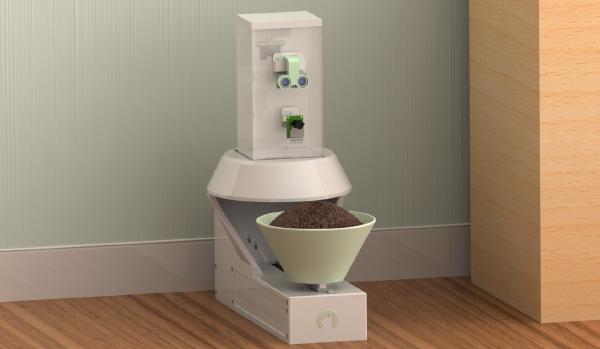
Autonomous Pet Feeder
- Built an Arduino-controlled feeder with a stepper-driven auger and servo-driven bowl carriage.
- Integrated ultrasonic, infrared, camera, and limit-switch sensing with a responsive state machine and web UI.
- Calibrated repeatable three-second servings and offloaded camera-based pet identification to a Flask server.
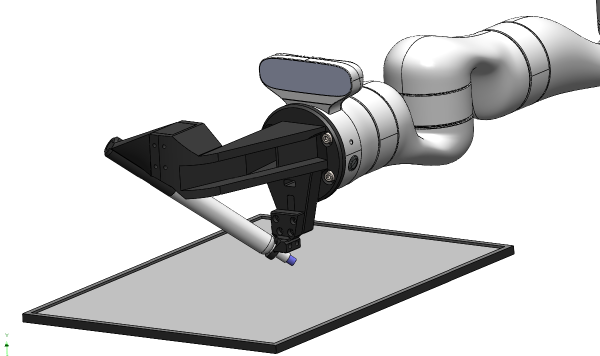
Robot Handwriting and Trajectory-Control System
- Improved a Kinova robot system for repeatable handwriting and rehabilitation trials.
- Diagnosed motion jitter and replaced the inverse-kinematics approach.
- Processed writing trajectories and redesigned the marker end effector.